Showing posts with label recipes - snacks. Show all posts

8.17.2012

fresh, easy homemade guacamole

I am a huge guacamole fan.


Unfortunately the husband is not.

He won't touch an avocado with a ten-foot pole.  Which means I usually have to make and eat my own guacamole all by myself.  (I know...  poor me, right?!)

Well, I found an easier way to get my fix and I am loving this arrangement:

Whenever Andrew makes his amazing Fresh Pico de Gallo Salsa, I steal some and make myself a super quick, delicious guacamole.


Two amazing treats with one burst of work (mostly done by the husband!)...  works for me, especially in these crazy new-baby days.

You could also use any great store-bought fresh salsa to make this quick recipe.  But the homemade salsa really makes this extra special!

Fresh, Easy Homemade Guacamole Recipe

Ingredients:
2 large, ripe avocados
3/4-1 cup fresh pico de gallo salsa
juice of 1 lime
salt & pepper, to taste

Directions:
I am medium bowl, scoop out the avocado flesh and mash it all up as chunky or smooth as you'd like.

Gently stir in the salsa and lime juice, both to taste.  Season with salt & pepper and serve!

(Guacamole tip:  If you are not going to serve this for a few hours, save the avocado pit and place it back in the guacamole before covering.  The pit will help keep the guacamole from turning brown!)


8.15.2012

homemade pico de gallo salsa (aka Andrew salsa!)

Adding to the list of Things Andrew Makes Better Than Me is this salsa.


It's not that I couldn't make this as well as him if I wanted to, it's just that I'm generally too lazy.

As in, when I make salsa, all these ingredients go straight into the food processor to get chopped up quickly and easily.

But no, it doesn't taste quite as good as this way.  Still good, but not the perfection that Andrew's salsa is.  :o)


I know this seems like quite a large batch, but trust me...  it won't go to waste!

And now I'm curious:  Do you prefer your salsa chunky like this (pico de gallo style) or more blended up?

Homemade Pico De Gallo Salsa (aka Andrew Salsa!) Recipe

Ingredients:
12 roma tomatoes
1/2 large red onion, finely chopped
1 bunch green onions, whites and light greens chopped
3-4 cloves garlic, finely chopped
2 large limes, juiced
2-3 jalapeños, finely chopped - with or without seeds, to taste
fresh cilantro, chopped
salt & pepper, to taste (we use about 1/2-1 tablespoon salt + 1 teaspoon pepper)

Directions:
Cut the tomatoes in half and gently scoop out the seeds and juice and discard;  Dice the rest.

In a large bowl, gently stir together the diced tomatoes and the rest of the ingredients.  Taste for spice and seasoning, adjust where necessary, and enjoy with chips!

This salsa keeps well for a day or two...  and actually tastes best on the second day, so feel free to make it ahead!


4.13.2012

homemade Mounds candy bars

Mounds Bars and Almond Joys have always been some of my favorite candy bars.

I remember being a kid and standing in the candy aisle trying to decide which one I wanted and then I would eagerly enjoy my pick, all the while thinking maybe I should have gotten the other...


(Which reminds me...  WHY do they not make a pack with one piece Mounds and one piece Almond Joy for the indecisive among us like me?!)

Needless to say, I was so excited when I found this idea for homemade Mounds Bars and even more excited at how I could enjoy them without all the guilt!

This is a super easy, delicious little recipe...  and the result is quite a bit healthier than you might expect!


You could actually take these quite a bit further into the healthy-zone, but I am happy right smack dab here in the middle.  :o)

Homemade Healthier Mounds Bars Recipe
adapted from Tasty Yummies

Ingredients:
2 1/2 cups flaked or shredded coconut
1/2 cup melted virgin coconut oil
1/4 cup raw honey (melted if it will be too firm to stir!)
1 teaspoon pure vanilla extract
pinch of salt
1 1/2 cups dark chocolate chips
1 1/2 teaspoons virgin coconut oil

Directions:
In a large bowl, mix together the coconut, coconut oil, honey, vanilla and salt until well mixed.

(The mixture may seem very greasy...  don't worry about it.  Everything will firm back up into a wonderful moist, chewy texture!)

Fill about 12-15 cups of a mini-muffin pan with the mixture, pressing down evenly and firmly.  Place in the freezer to set for at least 30 minutes.

Melt the chocolate chips with the coconut oil.  Spoon the chocolate evenly over the coconut in each cup, spreading smoothly.  Place the pan back in to the freezer to set another 30 minutes.

Use a knife to gently pop each candy bar out of the pan and transfer to a freezer-safe Tupperware to store in the freezer or fridge.  Or serve immediately!

These will get soft at room temperature for too long, so keep them cold until you are ready to serve them!


2.23.2012

homemade asiago, parmesan or cheddar cheese bagels

So, yesterday I showed you some delicious bagels...  the classic, plain style.  Today, I am showing you my favorite bagels...  cheese bagels!!


Asiago cheese bagels to be exact, but I have never turned down a parmesan or cheddar bagel either.  

The cheese really fancies up this treat and makes it extra special...  not that homemade bagels aren't pretty-darn special in themselves!

Homemade Asiago, Parmesan or Cheddar Cheese Bagels Recipe
adapted from An Epic Change
makes 12 bagels

Ingredients:
3 teaspoons active dry yeast
1 tablespoon sugar
1 1/3 cups warm water (about 105ºF), plus a bit more
1 tablespoon butter, melted and slightly cooled
1 1/2 teaspoons salt
4 cups all-purpose flour
2-3 cups shredded asiago, parmesan or cheddar cheese

Directions:
In the bowl of your stand mixer, dissolve the yeast with the sugar and warm water and let sit for 5 minutes, until the yeast is foamy.

Dump in the butter, salt & flour and mix with the dough hook attachment until the dough is smooth, elastic & tough...  At least 10 minutes.  (If the dough is not wanting to come together, or looks too dry, add water a tablespoon or so at a time, until the dough has come together).

Drizzle a bit of oil or melted butter on top of the ball of dough, turning once to coat, and then cover the mixer bowl with plastic wrap and place in a warm draft-free place.  (Unless it's the middle of summer, I usually wrap the bowl in a blanket and then place the whole bundle under the covers in my bed!  Works like a charm!).

Let the dough rise until double, 30-60 minutes, depending on how warm your house is.  Once the dough looks twice as big and you can gently press two fingers in the center of the dough and the indentation stays, it is ready.

Turn the dough out onto a floured surface and gently knead a few times.  Divide the dough into 12 equal portions and form each one into a ball.

Take the first ball and press a hole through the center with your thumb, turning in the edges and stretching it a bit to get a nice bagel-sized hole.  Repeat with all of the dough balls, placing them onto a floured board when they are done.

Cover the board loosely with plastic wrap and let the bagels rest for 30 minutes or so.

Meanwhile, preheat the oven to 425ºF and bring a large pot of water to a boil.  Once the bagels have rested, drop 2 or 3 at a time into the boiling water.  Let them boil for 1 minute or so and then flip them over and boil the other side for another minute or so.

Remove them to a parchment-lined and lightly greased baking sheet, and repeat with all the dough.

As soon as the bagels come out of the water, sprinkle them generously with the shredded cheese.  You can even sprinkle some cheese underneath them if you want extra-cheesiness!

Once you have 6 bagels on a baking sheet (you will have 12 bagels, so you need 2 baking sheets!), place the tray into the oven to bake for 18 minutes or so, until the bagels are nicely golden brown.

Let the bagels cool completely and then store them in an airtight container.  If you are not going to eat them all in the first day or two, slice them in half and freeze them for freshness!

(Here's your bagel-freezing tip of the day again:  Whether they are from the store, or homemade, make sure you slice them before you freeze them.  That way you can grab one out, pop it in the toaster and voilá...  you have a fresh, perfect bagel!)


2.22.2012

homemade plain bagels

Ever since I moved to the country :o) about 5 years ago now, I have had serious bagel withdrawals.

Yes, I know I can buy bagels at any grocery store, but they are just not the same thing as real new york style bagels from a real-deal bagel shop (like Noah's!).


I stock up when I go to the city, even asking for par-baked bagels sometimes, but I knew there just had to be a better (and cheaper) way!

I finally decided to buck up and try to make my own, and man am I glad I did.

These gorgeous, easy bagels are chewy, dense, crispy and so satisfying!

I'm not saying I won't be visiting my favorite bagel shop when I am in the city, but I will definitely be making these at home often!

(Also, in case you were wondering...  bagels freeze wonderfully!  And here's your bagel-freezing tip of the day:  Whether they are from the store, or homemade, make sure you slice them before you freeze them.  That way you can grab one out, pop it in the toaster and voilá...  you have a fresh, perfect bagel!)

Homemade Plain Bagels Recipe
adapted from An Epic Change
makes 12 bagels

Ingredients:
3 teaspoons active dry yeast
1 tablespoon sugar
1 1/3 cups warm water (about 105ºF), plus a bit more
1 tablespoon butter, melted and slightly cooled
1 1/2 teaspoons salt
4 cups all-purpose flour

Directions:
In the bowl of your stand mixer, dissolve the yeast with the sugar and warm water and let sit for 5 minutes, until the yeast is foamy.

Dump in the butter, salt & flour and mix with the dough hook attachment until the dough is smooth, elastic & tough...  At least 10 minutes.  (If the dough is not wanting to come together, or looks too dry, add water a tablespoon or so at a time, until the dough has come together).

Drizzle a bit of oil or melted butter on top of the ball of dough, turning once to coat, and then cover the mixer bowl with plastic wrap and place in a warm draft-free place.  (Unless it's the middle of summer, I usually wrap the bowl in a blanket and then place the whole bundle under the covers in my bed!  Works like a charm!).

Let the dough rise until double, 30-60 minutes, depending on how warm your house is.  Once the dough looks twice as big and you can gently press two fingers in the center of the dough and the indentation stays, it is ready.

Turn the dough out onto a floured surface and gently knead a few times.  Divide the dough into 12 equal portions and form each one into a ball.

Take the first ball and press a hole through the center with your thumb, turning in the edges and stretching it a bit to get a nice bagel-sized hole.  Repeat with all of the dough balls, placing them onto a floured board when they are done.


Cover the board loosely with plastic wrap and let the bagels rest for 30 minutes or so.

Meanwhile, preheat the oven to 425ºF and bring a large pot of water to a boil.  Once the bagels have rested, drop 2 or 3 at a time into the boiling water.  Let them boil for 1 minute or so and then flip them over and boil the other side for another minute or so.

Remove them to a parchment-lined and lightly greased baking sheet, and repeat with all the dough.

If you are going to top your bagels with anything, now is the time to do it...  actually a few minutes ago...  as soon as they come out of the boiling water.

Once you have 6 bagels on a baking sheet (you will have 12 bagels, so you need 2 baking sheets!), place the tray into the oven to bake for 18 minutes or so, until the bagels are nicely golden brown.

Let the bagels cool completely and then store them in an airtight container.  If you are not going to eat them all in the first day or two, slice them in half and freeze them for freshness!


2.18.2012

roasted chickpeas... or homemade corn nuts!

This delicious, healthy snack tastes like a cross between popcorn and corn nuts.  More like popcorn when it's warm and Corn Nuts when it cools off.  Either way, it's addicting!

But the best part ...  this roasted salty snack - that tastes sinful - is actually good for you!


Chickpeas (also known as Garbanzo Beans, they are one and the same!) are roasted in the oven with olive oil and then tossed with salt and seasonings.

And they turn out crunchy, flavorful and satisfying...  Even my 1 year old couldn't stay away from them!

Try these next time you are needing a salty-snack fix, but want to still eat healthy.  I know I will be making these often!

(Thanks for introducing these to me, Krysta!  They are definitely a new favorite!!)

Roasted Chickpeas (a.k.a. Homemade Corn Nuts!) Recipe
adapted from Steamy Kitchen

Ingredients:
2 cans (15oz each) chickpeas/garbanzo beans, drained and rinsed well
3-4 tablespoons olive oil
salt & pepper
Johnny's seasoning

Directions:
Preheat the oven to 400ºF.  Dump the chickpeas out onto a rimmed baking sheet and pat them mostly dry with a paper towel, discarding any loose skins that come off as you are patting.

Pour the olive oil over the beans and toss them well with your hands to coat.  Spread them out on the baking sheet so they are in a single layer and place in the oven to roast for 30-40 minutes, until they are nice and golden brown.  (You want a crunchy bean here!)

Immediately toss with seasonings, to taste.  You can use whatever you'd like...  I especially love the flavor of Johnny's and extra salt.  Change it up every time if you'd like!  Try something new!!


2.03.2012

cardamom & brown sugar broiled grapefruit

Have you ever tasted broiled grapefruit before?

If you haven't, please tell me you will soon?

Broiled grapefruit is absolutely amazing.

Beautiful, warm, sweet, sticky, juicy, tart...  packed with more flavor than you ever believed possible in a simple piece of fruit!


I love grapefruit in any form.  And so when I realized that I have never tried broiled grapefruit, I was somewhat appalled at myself!

(Thanks to my sweet friend Krysta for bringing this loss to my attention!)

So, I did what any sane pregnant girl would do (wait, is that an oxymoron?)...

I ran to the store, bought a bunch of grapefruits and had myself some broiled deliciousness.

And then I did it again the next day.

And the next.

It was that good.  :o)

Cardamom & Brown Sugar Broiled Grapefruit Recipe

Ingredients:
1 grapefruit
1 tablespoon brown sugar
1/2 teaspoon ground cardamom
tiny pinch of salt
1 teaspoon butter

Directions:
Preheat the broiler on High.

Cut the grapefruit in half and place on a rimmed baking sheet.

Sprinkle each side equally with the brown sugar, cardamom & salt and then dot with a few little dabs of butter.

Broil for 4-8 minutes, until the top is bubbling and starting to brown in spots.

Serve warm or at room temperature!


1.25.2012

coconut almond (or Almond Joy!) granola

Coconut Almond if you're feeling healthy...  Almond Joy if you're not!  :o)


This granola is chockfull of good-for-you stuff.  Raw coconut oil, raw honey, oats, almonds...  and then a little hint of chocolate, if you'd like, for the Almond Joy lovers in the world!


I usually only add chocolate chips to part of the batch after it's cooled for snacking on by the handful.  The rest I leave plain for eating with milk or yogurt and fruit!


Oh and if you are a close friend or family member...  this granola (without the chocolate chips, of course!) tastes a whole lot like Grandpa Cookies!  Ahhh...  comfort food.

Coconut Almond (or Almond Joy) Granola Recipe
adapted from He Sows, She Sews
makes about 4 cups of granola...  this recipe can be easily doubled!

Ingredients:
3 cups old-fashioned rolled oats
1/2 cup chopped or sliced almonds
1/2 cup flaked coconut, sweetened or unsweetened
1/4 cup melted virgin coconut oil
1/4 cup honey (preferably raw)
2 1/2 tablespoons water
1 teaspoon pure vanilla extract
1/2 teaspoon salt, to taste (I like a bit more added on after baking!)
1/2-1 cup mini chocolate chips, optional

Directions:
Preheat the oven to 350ºF.

In a large bowl, combine the oats, almonds & coconut...  stirring to mix well.

In a small bowl, whisk together the remaining ingredients, except for the chocolate chips.  Pour the wet ingredients over the dry ingredients, mixing well to coat.

Spread the granola onto a large rimmed baking sheet and bake for 20-30 minutes, stirring after 10 minutes and then every 5 minutes after that, until the granola is perfectly golden brown...  watching it closely at the end and being careful not to let it burn!

Let cool completely before adding chocolate chips, if you are going to, and storing in an airtight container.


11.11.2011

cookie dough no-bake energy bites

What??  These cookie dough bites are good for you?!  (Shhh...  Don't tell your kids!)


Full of natural ingredients...  these little no-bake bites are a great treat packed full of healthy energy.

Of course, I offered them to Bjørn as "cookie dough" (That's what they taste like!!) so he would try one...  he doesn't need to know any better and he loved them!

These yummy little bites were a huge hit in this house...  with me, a few friends, and both of the big kids.  We finished off the whole batch in about an hour of snacking!


(I love the extra coconut kick and healthy fats from the coconut oil, but if you don't have any - feel free to use more honey instead!)

Cookie Dough No-Bake Energy Bites Recipe

Ingredients:
1 cup old-fashioned rolled oats
1 cup sweetened or unsweetened flaked coconut
1/2 cup ground almonds, ground flaxseed, or wheat germ
1/2 cup mini chocolate chips
1/2 cup creamy peanut butter
1/4 cup raw honey
1/4 cup coconut oil
1 teaspoon pure vanilla extract

Directions:
In a large bowl, mix all the ingredients together until well combined.  You may want to use your [clean] hands for this...  it's much easier!! 

Once completely combined, roll the dough into small balls and place on a parchment or wax-paper lined baking sheet.  Chill in the fridge or freezer until completely set before serving... at least an hour. 

Store in tupperware in the fridge or freezer!


10.27.2011

vanilla chai-spiced granola

All the wonderful flavors of chai spice in a comforting granola form...  absolutely perfect sprinkled over a bowl of yogurt, or snacked on by the handful!


I finally recovered enough from the great pumpkin granola debacle of last month to attempt to make some more.

I was not, however, ready to attempt another pumpkin granola yet.  Bad memories and all...

So I switched from pumpkin to one of my other favorite fall treats.  Chai!

And boy am I glad I did!!  This simple cardamom-vanilla chai granola is perfect for this cold fall weather we're having!


Vanilla Chai-Spiced Granola Recipe
adapted from Together Table and Bon Appétit

Ingredients:
5 cups old-fashioned rolled oats
1/2 cup firmly packed brown sugar
1/2 teaspoon salt
1 tablespoon cardamom
1 teaspoon cinnamon
1/2 teaspoon ground ginger
1/2 teaspoon freshly ground black pepper
pinch of ground cloves
1/3 cup vegetable oil
1/4 cup honey
3 tablespoons sugar 
1 tablespoon pure vanilla extract

Directions:
Preheat the oven to 300ºF.  Line a rimmed baking sheet with foil and lightly spray or grease the foil.

In a large bowl, stir together the oats, brown sugar, salt & spices.  

In a small saucepan combine the oil, honey & sugar and heat over medium heat, stirring often, until melted and smooth.

Pour the warm honey mixture over the oats mixture and combine well, using your hands to really get every bit of oats coated.  

Spread the mixture out on the greased baking sheet and bake for 45 minutes to 1 hour, stirring every 10 minutes for loose granola and every 20 minutes for bigger clumps, until the granola is golden brown and dry.

Cool completely and then store in tupperware in the cupboard for up to 2 weeks if it lasts that long!


10.01.2011

pumpkin spice rice krispies treats

Yep.   That's what I said.  Pumpkin Spice Rice Krispies Treats.

No... I'm not joking.


These beauties are everything you love about your favorite Rice Krispies Treats but with an amazing kick of pumpkin and spice.

Oh my heavens.

Are you read for the secret yet?

Are you??

Here it is!


Yep!  These treats are made with store-bought pumpkin-flavored marshmallows!

And they are surprisingly good!

So good, in fact, that I had to stock up on these cute little marshmallows at WalMart since I know they won't be there long...

If you can find a bag of them, try these out.  You won't regret it!

Pumpkin Spice Rice Krispies Treats Recipe

Ingredients:
4 tablespoons butter (+ more for greasing the pan!)
1 (10oz) bag Kraft Jet-Puffed pumpkin spice marshmallows
6 cups Rice Krispies cereal

Directions:
In a large bowl, melt the butter in the microwave.  Add in the marshmallows, stirring and tossing to coat them in the melted butter.

Melt for about 1 1/2 minutes, stirring after 45 seconds, until the marshmallows are puffed and smooth when you stir them.  Stir well.

Dump in the Rice Krispies and stir until well mixed.  Press the mixture into a buttered 9x13" pan and let set for a few minutes.


9.22.2011

a flop... because I'm not perfect!

a.k.a. Pumpkin Pecan Praline Granola... That Didn't Turn Out!

I was so excited about this granola!  I loved loved loved the flavors, and imagined myself eating handful after handful of pumpkin-y goodness.

But then I took it out of the oven...


The flavor was exactly as I dreamed it would be!  Full and rich and spicy and oh so good!  

But the texture...  ugh.  Chewy. But not in a good way.  Dense and heavy and just plain frustrating.  

It was not a total loss, of course.  I will still stir it into yogurt, or maybe even stir it into my slow cooker steel-cut oatmeal before cooking it at night.  But I am mourning the loss of my dream!

Can you help?  Are you a granola-making-afficionado with tips for me??  I know that this is a low-fat recipe, and maybe that's just the problem right there....  But maybe it's something else?

Here's the recipe...  look at it and see if you can help me figure out where I went wrong!


Low-Fat Pumpkin Pecan Praline Granola Recipe
adapted from two peas & their pod

Ingredients:
5 cups old-fashioned rolled oats
2 teaspoons pumpkin pie spice
1 teaspoon cinnamon
3/4 teaspoon salt
3/4 cup firmly packed brown sugar
1/2 cup pumpkin purée
1/4 cup apple sauce
1/4 cup pure maple syrup
1 teaspoon pure vanilla extract
1 cup coarsely chopped or whole pecans

Directions:
Preheat the oven to 325ºF.  Line a baking sheet with parchment paper or foil.

In a large bowl, stir together the oats, spices & pecans.  In a medium bowl, whisk together the rest of the ingredients.

Pour the wet ingredients over the dry ingredients and stir well to combine.

Spread on the lined baking sheet and bake for 45-60 minutes until nice and toasty and golden brown, stirring every 10 minutes if you like looser granola, or stirring once or twice if you like bigger chunks of granola.

Cool completely before storing in tupperware!


7.29.2011

Norway on my heart... & a recipe

I am norwegian-american.  (Maybe you guessed by my kids names...  Bjørn & Haakon?)  

Born and raised in America... but with norwegian blood.


We have family, and close friends living over there.  And quite obviously... the tragedy in Oslo & Utoya - just one week ago - absolutely broke my heart.

Norway is such a peaceful country.  A beautiful place full of mountains and fjørds and amazing people and wonderful food.


Not the kind of place you would expect a bombing and horrible shooting-spree to occur.

(Do we ever really expect that kind of tragedy??  But for some reason it shocks me more in Norway than even here on American soil!)

So, with Norway even more on my heart than usual this past week...  I have often caught myself daydreaming of my favorite norwegian treats!

My heart is so full of love for that country and especially its people, and food is, well... a tangible expression of that love.

This little treat has been on my mind several times this week.  If you familiar at all with Norway or Scandinavia, you have likely heard about/seen/tasted smørrebrød - norwegian open-faced sandwiches.

Usually spread with butter and topped with good things like brown gjetost (goat's cheese) and jam, or shrimp salad and cucumber, and almost always beautiful...  they are a staple at every norwegian table.

(photo credit to come - when I can find it!)

My favorite is a simple butter, cheese, cucumber sandwich on dense norwegian bread (sometimes with a thin slice of meat and hard-boiled egg).  I could eat this every morning and night of my life and not grow tired of it!

But lately I  have been changing things up a bit and turn them into little almost-bite-sized snacks...  hearty crackers - topped with my favorite smørrebrød toppings!


(smørrebrød literally means "butter bread".  Now doesn't that just sound good?)  ;o)

Norwegian Open-Faced Sandwich Crackers Recipe

Ingredients:
Triscuits (shredded-wheat crackers), or some other hearty cracker
sliced cheese (your choice!  cheddar, jarlsberg, swiss, jack)
sliced english cucumbers
garnishes (mayo, mustard, red pepper flakes, etc.)

Directions:
Layer each cracker with a slice of cheese and a slice of cucumber.  Top with a bit of crushed red pepper if you'd like, and a sprinkle of salt if you are not using salty Triscuits!

I like to put a slice of hard-boiled egg and a tiny dab of mayo or mustard on top sometimes!

Yummm...

---

Join me in continuing to keep the people of Norway and those who love her in your prayers as they heal through this tragedy, won't you?


4.12.2011

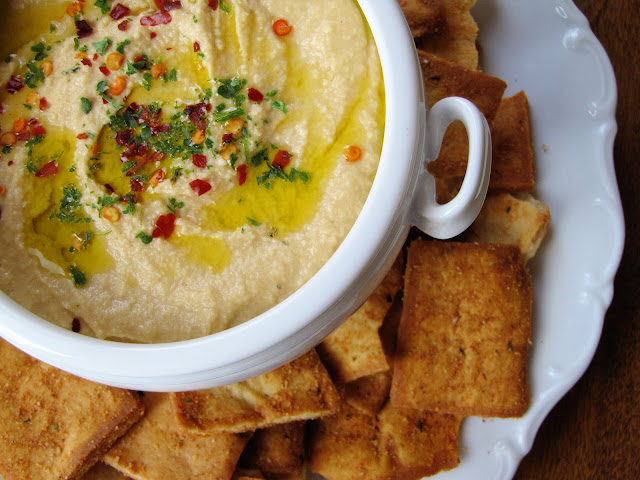
copycat Trader Joe's mediterranean hummus recipe

If you've ever had Trader Joe's Mediterranean Hummus, you probably have a good idea of why I have been so motivated to recreate this stuff at home.


Ever since I tried TJ's Mediterranean Hummus for the first time, I have been obsessed.  I have been trying to fine tune this recipe for years, & I think I've finally got it down!

Now, I know my recipe may not be exactly the same as theirs... but for those of us who can't pop in to a TJ's whenever we want, this recipe is a very close second!

Try it out (and if you do live near a Trader Joe's, please buy a container to do a side-by-side comparison) and let me know what you think!  :o)


This is a very creamy, smooth & lemony hummus.  Not as strong on the tahini side of things as some hummus recipes you may be used to, but those differences are what make this so good!

Copycat Trader Joe's Mediterranean Hummus Recipe

Ingredients:
2 cans garbanzo beans (chickpeas) drained (about 3 cups)
1 garlic clove
6 tablespoons extra virgin olive oil
2 tablespoons tahini
1 1/4 teaspoon salt
zest of 1 large lemon
juice of 2 large lemons
1/4 teaspoon cumin
1/2 teaspoon crushed red pepper
about 1/2 cup hot water

Directions:
Place the garlic clove in the food processor and pulse a few times.

Dump the rest of the ingredients in to the food processor, except for the hot water, and run for 3-4 minutes.  After the first 30 seconds or so, stream in the water while the processor is still running - until you reach your desired consistency and continue to process until very smooth and creamy.

Taste for seasoning and consistency, adding a bit more water if needed.  This will set up a bit in the fridge, so make it a tad runnier than you think you'd like!

Pour the hummus into a container & chill a few hours or overnight before serving to let the flavors meld.

Before serving, drizzle with a little bit of extra virgin olive oil and sprinkle with crushed red pepper flakes.

(For a true Trader Joe's copy, top with pine nuts, dried parsley, and dehydrated bell pepper!)

Serve with veggies and rice crackers or pita chips!


3.31.2011

lucky charms marshmallow bars

These are my little twist on Rice Krispies Treats, one of my husbands favorite things...  crossed with Lucky Charms, one of his favorite cereals!


We absolutely love Lucky Charms around here, and this is such a fun way to enjoy them!

Actually, this is kind of the only way we can enjoy them anymore...  Bjørn loves the marshmallows so much that, if we pull out a box for any reason, he throws a fit until he gets some!

The problem with that is...  he will only eat the marshmallows, leaving a whole mess of plain cereal that no one is excited to eat.

So, when I saw some pre-packaged cereal bars similar to these at the store the other day - I loved the idea... but I didn't love the price, and knew I could make them much cheaper at home.

Enjoy!  :o)


Lucky Charms Marshmallow Bars Recipe

Ingredients:
4 tablespoons butter
1 (10oz) bag marshmallows
6-7 cups Lucky Charms cereal*

Directions:
Grease a 9x13" dish or a large tupperware container.

In a large saucepan, melt the butter.  Stir in the marshmallows and continue to cook, stirring often, until the marshmallows are melted and smooth.

Remove from the heat and stir in the cereal until combined.  Spread into your greased container and press down with damp fingers to flatten and smooth the top.

*You can adjust the Lucky Charms amount depending on how...  gooey...  you like your bars.  We like 'em really gooey, so I used 6 cups cereal!


3.28.2011

chocolate covered frozen kiwi pops


I saw this idea a few weeks ago on Pinterest and was so excited to try it when my cousin left a few kiwis at our house last week!

They are so refreshing, cute and fun...  and I feel a lot better about serving this to my toddler than an ice cream bar!

Once again, I did not temper my chocolate... for 2 reasons.  1st, I don't know how.  2nd, I am all about simplicity, and really...  I don't care if my frozen chocolate-dipped goodies 'bloom' a bit (that's what you call it when they get that white-ish look to them!) because they taste exactly the same!  :o)


Chocolate Covered Frozen Kiwi Pops Recipe
adapted from ShowFood Chef via Pinterest

Ingredients:
3-4 kiwis
2 cups chocolate chips
1 1/2 - 2 tablespoons vegetable oil

Directions:
Slice off the ends of the kiwis and peel them carefully with a knife.  Slice each kiwi into 1/2 inch or so slices.

Stick a lollipop stick into each slice, lay the slices on a parchment-lined tray and freeze for an hour or two until very firm.

In a medium glass bowl set over a pot of simmering water (but not letting the water touch the bottom of the bowl), melt the chocolate and oil together until smooth.

Working quickly, take the kiwi-pops out of the freezer and dip each one into the melted chocolate, tapping gently to let the excess chocolate drip off.  Place them back on the parchment tray and again into the freezer for an hour or two to set.

If you want to decorate them (like I did with the hearts!) scrape the extra melted chocolate into a ziploc bag, cut off a tiny tip and drizzle designs on the cooled chocolate-covered pops.


(Did I mention my almost-two-year-old loves them?)  :o)


3.15.2011

frozen grapes...

If you've never had frozen grapes before, you are in for a treat!

They are such a fun, refreshing snack...  I think they taste kind of like little miniature popsicle balls.  :o)

This recipe is especially perfect for that bag of grapes you bought the other day that are just not as firm and crisp as you had hoped.  (I don't think "crisp" is the right word, but you know what I mean, right?!)


Now this is obviously more of a method than a recipe, but I am going to post it in recipe format just to keep things simple...  and fun.  :o)

Frozen Grapes Recipe 

Ingredients:
grapes (duh.)

Directions:
Rinse the grapes well.  Let them drip dry a bit in the colander.  (If they're a little wet still when you freeze them, they will stick together a bit.  No big deal!)

Pick the good grapes off the stems (discarding mushy-shriveled ones!) and dump them all into a freezer-safe container.  Freeze a few hours until firm.

You can store these in the freezer for days, or even weeks if you want!

*If you are serving these to little kids, take them out of the freezer and let them soften for a few minutes, just to reduce any choking worries!


Related Posts with Thumbnails