3.29.2012

20 weeks down... 20ish more to go!

I just can't believe that we're halfway done already!

I know pregnancy is never the same as when it's your first, but I just can't believe how much faster each pregnancy seems to go than the one before.

I'm still processing the fact that we are having a GIRL, but I am so excited!


I think some small part of me will never fully believe it until I see her with my own eyes.

:o)  Just call me an excited skeptic, I guess!

Oh, and according to The Bump, Baby Girl is now the size of a cantaloupe...


Can you believe it?!


3.28.2012

almond dark chocolate chip cookies

Sometimes a plain old chocolate chip cookie is exactly what you need.

And sometimes it just won't cut it.

The idea is still there, but you just need a little more 'oomph', you know?

Well that's where these cookies come in!


Dark chocolate chips and drizzle, and a hint of almond in the dough makes these a grown-up version of our favorite classic treat.

I love almond flavoring so much.  Almond mochas, Sandbakkelse (norwegian almond butter cookies), and a whole slew of other almond treats live at the top of my Favorites List.

It's hard for me to pass up any treat that has almond in it!

My husband, unfortunately does not agree.  So, I think you'll find a subtle flavor in these cookies...  since I didn't want to scare him away from eating some.


Try these next time you are craving chocolate chip cookies...  but with a twist!

Almond Dark Chocolate Chip Cookies Recipe

Ingredients:
2 cups + 2 tablespoons flour
1/2 teaspoon baking soda
1/2 teaspoon salt
3/4 cup butter, melted and cooled slightly (still warm)
1 cup firmly packed brown sugar
1/2 cup sugar
1 large egg
1 egg yolk
2 teaspoons almond extract
1 1/2 cups dark chocolate chips
additional dark chocolate for drizzle, optional

Directions:
Preheat the oven to 325ºF. Line 3 baking sheets with parchment paper.

In a small bowl, whisk together the flour, baking soda & salt; Set aside.

In your mixer bowl, cream together the warm butter and sugars until light and fluffy, at least 3 minutes. Beat in the egg, egg yolk & almond extract until smooth.

Beat in the flour mixture until just combined and then stir in the chocolate chips.

Take about 1/4 cup of the dough and form it into a ball in your hands.  Hold the ball in both hands and gently break it apart (like you are cracking an egg!) and set the dough pieces craggly-side up on the baking sheet.  (You now have 2 cookies from that 1/4 cup of dough).

Repeat until all the dough is gone, allowing plenty of space in between cookies on the sheets so that they have room to spread.

Bake for 10-15 minutes, depending on your oven and the size of your cookies - until the cookies are barely golden brown around the edges... being careful not to over-bake them.

Remove them from the oven, leaving the cookies on the baking sheets until they have firmed up enough to lift off the pans... around 5-10 minutes.

Once the cookies are completely cool, you may drizzle them with some melted dark chocolate, if you'd like!

Store in the freezer for best results!


3.27.2012

tomato feta salad or bruschetta

This bright, fresh salad of tomatoes, feta and herbs is summer in my mouth.


I know it's not summer yet, but in this dreary, cold, damp Pacific Northwest, I really really needed some summer in my life!

Of course you can usually get good tomatoes year-round at the market, so this salad can be made anytime you like...

But can you just imagine how amazing it would taste with tomatoes and herbs fresh from your summer garden?


Even my tomato, feta & vinegar hating husband loves this salad, even though he doesn't like to admit it.

When I make it and put it in front of him, it's not long before the whole bowl is gone!!

Tomato Feta Salad Recipe
Serves 4-6

Ingredients:
6 cups seeded, diced tomatoes (or 3 pints cherry tomatoes, halved)
3/4 lb crumbled feta (preferably French goat feta)
1/2 large onion, finely chopped
6 tablespoons white wine vinegar
1/2 cup good extra-virgin olive oil
1/2 cup basil leaves, chopped
1/2 cup italian parsley, chopped
salt & pepper, to taste

Directions:
Gently toss together the tomatoes, feta and onion in a large bowl.

Add the vinegar, oil, basil, and parsley;  Toss gently again and season to taste with salt and pepper.

Serve at room temperature with sourdough toasts or fresh french bread slices.


You can mix this salad up so many ways...   My favorite is tossed with a bunch of chopped fresh romaine.

You could also mix it with cooked, cooled pasta or quinoa for a great summer potluck dish.  Or of course it is amazing just the way it is!

Halve this recipe if you'd like, but I doubt you'll have any problem finishing it off!

Come share in the tomato love at the Tomato Love Recipe Exchange, hosted by Gimme Some Oven & Bake Your Day, sponsored this week by KitchenAid.  Also visit Recipe for Change to learn more about how to support tomato farmers.


3.26.2012

chewy lemon bars

These sweet, easy lemon bars (cutely dubbed "Lemonies" by the original author!) are what I would imagine the love child of a brownie and a lemon bar to be.

The tangy sweet flavor of a lemon bar, with the dense, rich texture of a brownie...  all covered in a sweet-tart lemon glaze! 

So delicious and so simple to throw together.


Lemony treats are my favorite.

I know I have a lot of favorites, but lemony things really are my favorite favorite.

Obviously when I saw this recipe on Pinterest the other day, I knew I had to try it soon.

I just so happened to have a big bowl full of lemons in my fridge (did you know how cheap it is to get a  big bag of them at Costco?!) and needed something to photograph with my new camera...

So here you go!

(I absolutely adore these bars.  I will be making them often.  More than often.  My family and friends will most likely get sick of them long before I do.  I never get tired of lemons!)

Chewy Lemon Bars Recipe
adapted from Rita's Recipes

Ingredients:
for the bars:
1 1/2 cups flour
1 1/2 cups sugar
1/2 teaspoon salt
1 cup butter, melted & slightly cooled
3 large eggs
1/2 teaspoon pure vanilla extract
2 tablespoons fresh squeezed lemon juice
1 teaspoon packed lemon zest (from 1 lemon)
for the glaze:
1 cup powdered sugar
3 tablespoons fresh squeezed lemon juice
1 teaspoon packed lemon zest (from 1 lemon)

Directions:
Preheat the oven to 350ºF.  Butter a 9x13" glass baking dish.

In a large bowl, whisk together the flour, sugar & salt.  Mix in the melted butter until combined.

In a separate bowl, whisk together the eggs, vanilla, lemon juice & zest until combined.  Mix this into the flour mixture combined and smooth.

Spread the batter into the prepared baking dish and bake for 30-40 minutes until just set, golden and a toothpick inserted in the center comes out clean.

Let the bars cool completely in the pan before glazing.

In a small bowl, whisk together the lemon juice, zest and powdered sugar for the glaze until smooth.  Pour over the cooled lemon bars and refrigerate until nice and firm before serving!


Isn't this little guy adorable?  He was sick with a fever yesterday and he didn't eat any lemon bars, but he was just so excited that I was even making "hownies" that I don't think he cared!


3.23.2012

It's a...

GIRL!!!

And yes, Baby Girl already has her first pair of shoes.

Can you even stand how cute these little Robeez are???


I have to confess...  I actually bought these over 3 years ago, when I was just barely pregnant with my first boy.

Needless to say, they've been sitting in my closet for a while, and they are ready for some use!

Also, I kind of feel like I am starting all over with this parenting thing.

Boys, I can handle.  I was prepared for another boy.  This whole girl thing has thrown off my whole game.

Not that that's a bad thing, mind you...  just a crazy, fun new adjustment!

Any tips for me on raising girls? 

Oh, and in case you were wondering what Baby Girl's next pair of shoes will be?

Well, these tiny TOMS of course...  to match her mama's!  

Eek!!


3.22.2012

overnight cinnamon rolls with perfect cream cheese frosting

Ok, so last week I posted the recipe for this Perfect Cream Cheese Cinnamon Roll Frosting, and now I am going to share with you the amazing cinnamon rolls that go with it!

I have been on a quest for the perfect cinnamon roll for years and years.  I keep trying them and keep finding things I don't love about each recipe.

Well, finally this is a compilation of all the things I love from several recipes and I am so excited about the results!!


I adapted my recipe so that the dough can rest in the fridge overnight and I can pop the cinnamon rolls in the oven to bake in the morning...  because let's face it:  Morning is when we usually want cinnamon rolls and morning is not when I want to do the work of making cinnamon rolls!

Get these rolls ready in the evening (or whenever you have time - you can always freeze the pan at the 'refrigerate overnight' point and just take them out of the freezer to thaw overnight before baking them!) and in the morning you have fresh, warm, sweet, gooey cinnamon rolls to spoil yourself with!

Overnight Cinnamon Rolls with Perfect Cream Cheese Frosting Recipe
serves 12

Ingredients:
for the dough:
1 cup milk
1/3 cup butter, room temperature
2 1/2 teaspoons active dry yeast
1/2 cup sugar
2 large eggs, room temperature
1 teaspoon salt
4 1/2 cups (or so*) all-purpose or bread flour
for the filling:
1 cup butter, room temperature
1 cup firmly packed brown sugar
3 teaspoons cinnamon
1/2 teaspoon nutmeg
for the frosting:
6oz cream cheese (approximately...  just eyeball 3/4 of a brick!)
1/2 cup butter, room temperature
2 1/2 cups powdered sugar
1/2 teaspoon pure vanilla extract
1/2 teaspoon almond extract
1/4 teaspoon salt

Directions:
In a small saucepan, heat the milk and butter together until the butter is melted.  Set aside and let cool to warm (110ºF).

Pour this mixture into the bowl of your stand mixer and sprinkle the yeast over the warm milk/butter mixture with 1 teaspoon of the sugar and let sit and get bubbly and foamy for a few minutes.

Mix in the rest of the 1/2 cup of sugar, the eggs & salt until combined. Mix in most of the flour until combined and then switch to your dough hook attachment.

Knead the dough on med-low speed (2 on a KitchenAid!) until smooth, adding the remaining flour bit by bit if needed.

(*Remember, making doughs with flour is not an exact science.  Flour is temperamental... you can bake the same recipe several times and you may need different amounts of flour each time.  The end result of a smooth dough is more important to focus on than the exact amount of flour you ended up using!)

Lightly grease a large bowl.  Place the kneaded, now smooth, but still soft dough into the bowl and turn once to coat the top of the dough.  Cover the bowl tightly with plastic wrap (or a lid!) and place in a warm, draft free place to rise until doubled in size, about 1 - 1 1/2 hours.

(I put my dough-bowl under the covers in my bed to rise because my house is quite large and drafty!  If it's very cold in the bedroom, I'll even pile extra blankets on top...  or use an electric blanket on low if I have one!)

Once the dough has doubled in size (eyeball this, but you should also be able to press down two fingers into the dough and it should leave an indent that doesn't pop back out!), punch down the dough gently to deflate it.

Turn the dough out onto a floured surface, cover with a damp towel and let rest for 10 minutes or so.

Sprinkle a bit more flour on top of the dough and roll it out into a large rectangle (about 16x20" or so!).

In a large bowl (or your clean mixer bowl!) beat together the filling ingredients until smooth and fluffy. Spread the filling evenly over the rolled out dough.

Roll the dough up into a long log and press the seam together (you can use a bit of water on your fingertips to do this if needed!).  Gently cut into 12 rolls with a serrated knife and place the rolls cut side up in a greased 9x13" baking dish.

Cover with plastic wrap and place in the fridge overnight.  (If you don't want to make these overnight, then just cover loosely and let rest on the counter for 30 minutes before proceeding).

Remove the rolls from the fridge to take the chill off and preheat the oven to 375ºF for about 30 minutes.  Bake for 20-30 minutes, until the cinnamon rolls are golden on top and no longer doughy in the middle if you peek with a fork.

While the rolls are baking, beat together the frosting ingredients, cream cheese and butter first and then adding the rest, until smooth.

When the rolls come out of the oven, frost and serve!

(Tidbit:  These are LARGE cinnamon rolls!)


3.21.2012

postpartum belly binding

Yep, you heard right.  I am going to talk to you about postpartum belly binding!  (If you are not pregnant, not going to be pregnant, or don't know anyone who is or may be pregnant someday, please feel free to ignore this post and scroll down for some yummy recipes!)

Right now, I am pregnant with my 3rd child.  I used postpartum belly binding in the form of a Belly Bandit after both of my last pregnancies and will be happily doing so again after this baby gets here.

After baby #1, I had the Belly Bandit on by the 2nd day I was home (after all the water-weight was gone from my IV-fluids).  After baby #2, I had the Belly Bandit on within minutes of getting out of the tub where he was born!


One thing I can tell you for sure...  these things feel amazing.

Besides the claims that they bring back your shape faster (which they do, by the way... as long as you use them exactly how they are intended!), they are incredibly supportive and comfortable when your back and ab muscles are so sore and weak after a long pregnancy!

New moms in countries all around the world have been using belly binding postpartum as a cultural norm for centuries...  I think they're pretty smart and I'm glad I found this little treasure before I had my first child!

In case you're wondering, because I know you are, yes, belly binding will help you tremendously even if this is not your first pregnancy.  Any time you have given birth is a great time to support and tone your back and stomach muscles and bring your core back together quicker and easier!

Have you tried, or thought about trying, Postpartum Belly Binding?  Do you have any specific questions for me?

I'm very passionate about this topic, and I'd love to chat with you more about it!

*Disclaimer:  This is not a sponsored post.  I love Belly Bandit, found them on my own, have used them twice, soon to be 3 times and wanted to share how much I've learned with you!


3.20.2012

healthier no bake cookie bars

There is just something about No-Bake Cookies that makes me incredibly happy.

Maybe it is the amount of (or should I say lack of) work involved...  or the fact that I don't even have to turn my oven on...  or simply how amazing they taste with a cold glass of milk?!

Whatever it is, I think I just fell in love with them a little bit more.


This recipe is a much healthier, guilt-free, and if you can believe it - even easier - version of these sweet, luscious little treats!

How are they easier?  No boiling, and you don't even have to scoop them into cookies!  Just pour the warm batter into a greased pan and let it chill.  So easy!!

How are they healthier??  Well, this recipe takes out a lot of the refined sugar in traditional no-bakes.  Besides the peanut butter, chocolate chips and the sweetened coconut (which you could of course replace with unsweetened!) the majority of the sweetener is raw honey.  And the butter has been replaced with virgin coconut oil, which makes these much more heart-healthy!

And you know what else?  They taste amazing!  My husband said "they taste just like the other ones!"...  which is pretty high complement from someone who doesn't usually like when I 'healthify' one of his favorite treats!  :o)

Healthier No Bake Cookie Bars Recipe
adapted from New Nostalgia

Ingredients:
1 cup creamy peanut butter
2/3 cup raw honey
1/3 cup unrefined virgin coconut oil
1 1/4 cups chocolate chips or chopped dark chocolate
1 teaspoon pure vanilla extract
2 cups old-fashioned rolled oats
1 cup sweetened flaked coconut

Directions:
Line a 9x13" pan with foil or parchment and grease generously.

In a medium saucepan, melt the peanut butter, honey and coconut oil over medium heat, stirring occasionally.

Stir in the chocolate chips until melted and then remove from the heat and stir in the vanilla, oats and coconut.

Spread this mixture evenly into the prepared pan, cover and chill in the fridge until set, at least one hour.

These bars do get soft fairly quickly at room temperature, so store them in Tupperware in the fridge or freezer!


3.18.2012

speaking of eggs...

I need your help!

We are planning on getting some chickens sometime in the near future to help offset the amount of eggs that we go through in this house!  (2-3 dozen a week at minimum right now!)


But, we have no real idea where to start.

Can you help?

I'm asking for any and all advice where it comes to raising laying chickens!

What kinds/breeds of chickens, how many, types/important features of a coop, ideas to help keep out our many wild animals around here, etc.

Seriously...  bring on the advice!  Please!!

(And thank you!!)


3.16.2012

Eggstraordinary Spring Entertaining [a guest post]


Shelly from Cookies & Cups is sharing with us a lovely new twist on a breakfast tart this morning sponsored by Land O Lakes eggs!

I can't wait to give this a try soon...  it sounds delicious!!


I have always wanted to be a brunch person.

Here's my romanticized version of a "brunch day:" Wake up on a sunshiney, springtime Sunday morning (without an alarm clock or children jumping on my stomach), read the weekend newspaper in my crisp white-sheeted bed with no obligations to get ready for, lazily look over at my husband and say, "Let's go for a drive today," to which he would say, "Yes, let's go for a Sunday drive right after we have a nice, relaxing brunch."

That's how it goes down in my mind. What really happens is more like this...
Sunday morning 6:45 am I am woken up to "MOMMMMM!!! Can we play Wii?" "MOMMMMM!!! What's for breakfast?!" "MOMMMMMM!!! Can Joey come over today?"

All of that before 7:00 am. No mention of a Sunday drive, no mention of the weekend newspaper, no mention of brunch. Sigh.

What I have discovered is I can marry the romanticized version with the real-life version. Kinda.
Here's how: plan a brunch at home.

I can do that! Have it be for just your family, or invite people over to hold yourself accountable. I suggest the inviting of other people, because Sunday mornings can quickly get away from you if you let them.

What I have found is that brunch, while sounding all fancy and glamorous, is totally doable. Easy, actually. All you need to do is plan your meal around a single main course dish. One that can be prepared in advance is not only recommended but encouraged.

Eggs are a favorite ingredient when making food to share for springtime gatherings and celebrations. A favorite go-to brunch meal in our family is a tart or a quiche. They are so adaptable and easy.

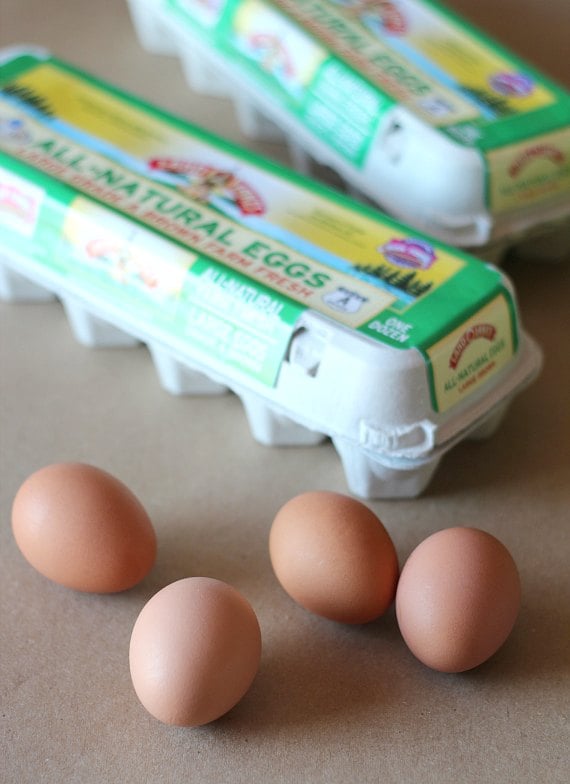
You can make your springtime brunch more special, and more delicious, by using high-quality LAND O LAKES® All-Natural Farm-Fresh Eggs. Using higher-quality ingredients makes every part of your brunch more special, in my opinion.

Here's my favorite Sunday brunch meal...it's fancy enough to serve on special occasions but simple enough to serve to your family on any given weekend.

Start with LAND O LAKES® All-Natural Farm-Fresh Eggs. All LAND O LAKES® Eggs are “eggstraordinary” because they are produced by hens fed a premium, vegetarian whole-grain diet consisting primarily of whole ground corn and soybean meal, with no added hormones, antibiotics, animal fats or animal by-products. These eggs are gathered at the peak of the hens’ egg-laying cycles, which can make the eggs more delicious.


You will need to place a pie crust in a 10" tart pan. Bake the crust for 5 minutes and transfer to wire rack.
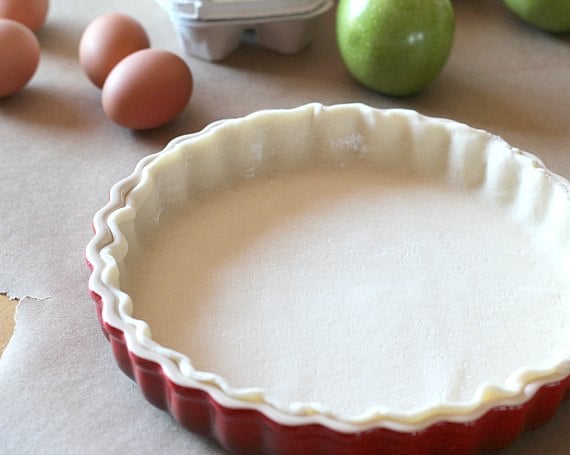


While the crust is baking, cook the breakfast sausage and mix the egg mixture...
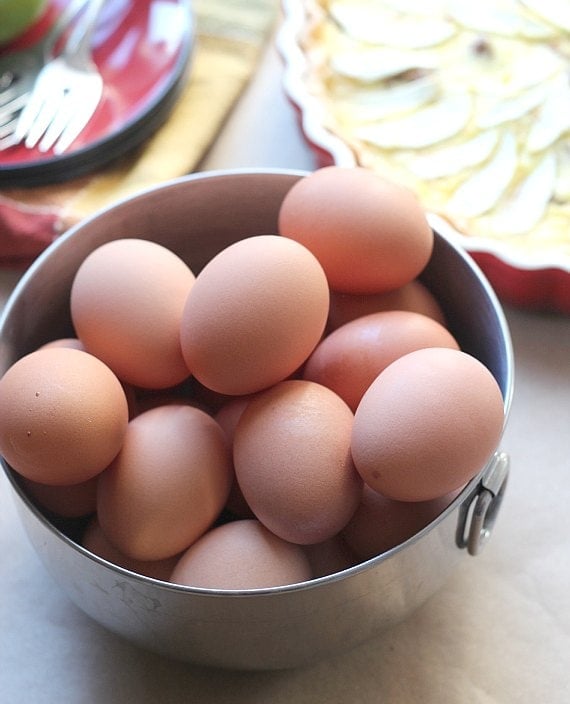


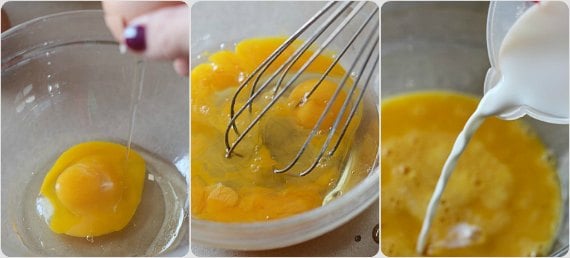
Crack the eggs in a bowl, whisk together and add some milk and seasonings.


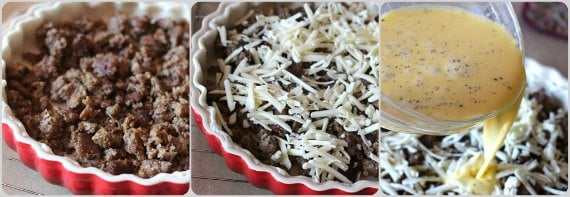
When sausage is cooked, spread evenly on top of the partially-cooked crust. Then sprinkle cheese on top and cover with the LAND O LAKES® Eggs mixture.


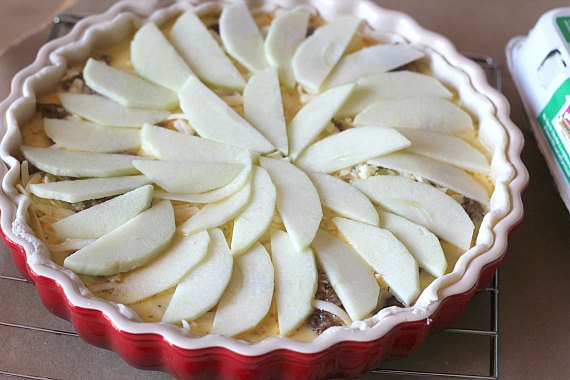
Finally, slice a medium green apple into thin slices and arrange on top of the tart.


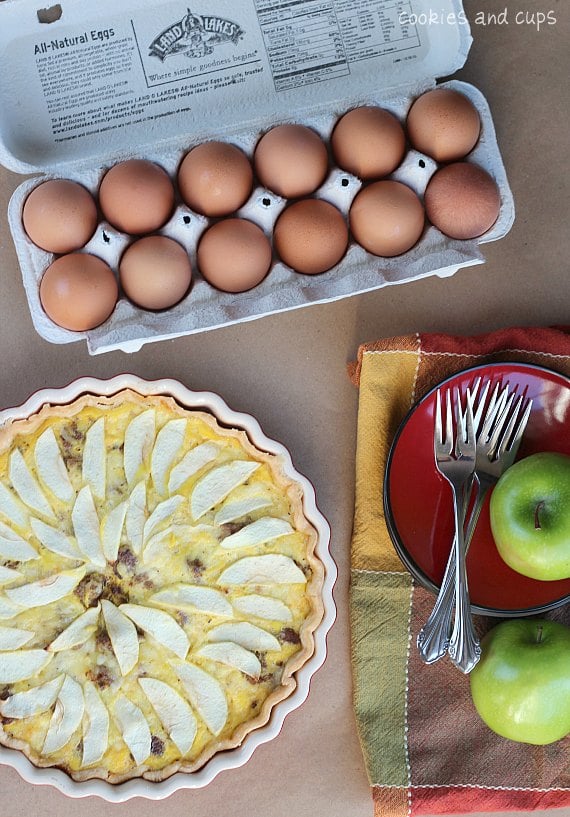
Bake the tart for 40- 45 minutes until center is set. You will have a gorgeous, completely impressive main course for your brunch. What's lovely about this tart is you can serve it warm, room temperature or even cold.


Now guess what? I want you to have your own brunch. And to do that you will need money, right?

How about $100? That should cover it nicely, I think...

To enter for a chance to win a $100 Visa gift card, courtesy of BlogHer, leave a comment on this post telling me:

What is your favorite spring egg dish to make when you’re hosting guests?

SWEEPSTAKES/GIVEAWAY RULES No duplicate comments. You may receive (2) total entries between 3/16 and 3/29 by selecting from the following entry methods:a) Leave a comment in response to the sweepstakes prompt on this post b) Tweet about this promotion and leave the URL to that tweet in a comment on this post c) Blog about this promotion and leave the URL to that post in a comment on this post d) For those with no Twitter or blog, read the official rules to learn about an alternate form of entry. This giveaway is open to U.S. residents age 18 or older. Winners will be selected via a random drawing, and will be notified by e-mail. You have 72 hours to get back to me, otherwise a new winner will be selected. The Official Rules are available here. Good Luck!
Egg, Apple, Cheese and Sausage Tart
16 oz breakfast sausage, cooked and drained
2/3 cup milk
1 (heaping) cup grated sharp cheddar cheese
1 tart apple, cut into thin slices
1 pie crust (pre-made or homemade)
salt and pepper to taste

Preheat oven to 350°
Place the pie crust in a 10" tart pan. Bake for 5 minutes and transfer to wire rack.
Cook breakfast sausage in a medium skillet, drain.
In a medium-sized bowl whisk eggs, then add milk and salt and pepper. Whisk again to combine.
Spoon sausage into partially baked pie crust, sprinkle cheese on top of sausage and pour egg mixture evenly over sausage and cheese.
Finally, arrange apple slices on top.
Bake 40-45 minutes until center is set.
Serve warm, room temperature, or even cold.
*Can be made ahead to serve the next day and can also be frozen.
*Store covered in refrigerator for up to 3 days

3.15.2012

triple chocolate peppermint brownie bites... and a fun little giveaway!

Happy almost St. Patrick's Day, friends!

Do you have a whole menu of fun already planned to celebrate tomorrow?  Or are you a little last-minute like me and still looking for something 'festive'?!

Well, I am not Irish, but I sure love an excuse to bake a cute little treat for the kiddos!


These pepperminty, fudgy brownie bites (well, maybe bigger than a bite, but it depends on who's bite it is!) are so fun and festive...  and it sure doesn't hurt that they are delicious!!

You can make these treats for any holiday by changing up the food-coloring, or just leave the food coloring out completely for a classy look!

-----

Also, for a holiday treat... how about a little giveaway? 

McCormick has a great little baking kit for you!

McCormick's Pure Peppermint Extract & Green Food Coloring... and some fun St. Patrick's Day cupcake liners and decorations!

(Yes, I know the day will have passed by the time you receive the kit, but since when do 4-leaf clovers not also mean spring?!  Or you could always save the liners for next year if you want!)

This is an easy one...  there is only one way to enter:

Comment on this post telling me what your favorite or most memorable 'festive' treat as a child was!

Only one comment per person, please!

There will be 5 winners, drawn at random...  and the giveaway will end this Sunday night March 18th at 11:59pm PST!  Sorry...  this one is open to US addresses only!


Triple Chocolate Peppermint Brownie Bites Recipe
makes 24 servings

Ingredients:
3/4 cup dutch-processed unsweetened cocoa powder
1/2 teaspoon baking soda
2/3 cup butter, melted & divided (1/3 cup + 1/3 cup)
1/2 cup boiling water
2 cups sugar
2 large eggs
1 teaspoon McCormick's pure peppermint extract
1/4 teaspoon salt
1 1/3 cup flour
1 cup semi-sweet chocolate chips
1 1/2 cup white chocolate chips
McCormick's green food coloring

Directions:
Preheat the oven to 350ºF.  Line 2-12 cup muffin tins with paper liners.

In a large bowl, whisk together the cocoa powder and baking soda. Whisk in 1/3 cup of the melted butter until smooth. Whisk in the boiling water until thick.

Whisk in the sugar, eggs, remaining 1/3 cup melted butter and the peppermint extract until blended and smooth.

Toss the semi-sweet chocolate chips with 1 teaspoon of the flour to coat.

Stir the rest flour and the salt until just thoroughly mixed.  Gently fold in the flour-dusted chocolate chips and scoop the mixture evenly into the muffin tins, filling each one about 3/4 full.

Bake for 30-35 minutes, until the brownies are just set and starting to pull away from the edges a tiny bit.

In a medium bowl, melt the white chocolate chips carefully in the microwave (heat for 30 seconds, stir well and repeat until melted and smooth).

Stir in as much green food coloring as you would like and then carefully spoon a bit of the green white-chocolate onto each brownie.

Cool and serve!

*****

Giveaway Winners!!

comment #10 - manda
comment #4 - amy beth m.
comment #8 - Myfudo
comment #5 - Leyah N.
comment #6 - tamaraben

Please email me (sweetannasblog[at]gmail.com) and send me your address!  If I don't hear from you within 48 hours, I will draw a new winner!


3.14.2012

cinnamon roll frosting & preggo ramblings at their finest...


My brain is officially Out of Order.  I can't seem to do anything right these days and I can hardly remember the beginning of my thought once I get to the end.

It's a miracle that I can even get dressed these days...  really, it is!

Pregnancy gives me this great and at the same time frustrating burst of creative energy in the kitchen.

Great because for some reason most of my fears and worries disappear and I try things I would normally shy away from for fear of failure.

Frustrating because I can hardly remember my own name these days, let alone whether I just put sugar in a recipe, or was that salt?  And did I just count out 2 cups?  Or was that 3?!

Case in point...  I wanted to make some homemade cinnamon rolls yesterday.  I had a craving, and we all know preggo cravings cannot go ignored for long.

I found a recipe that looked good, copied it down on a piece of scrap paper and got to work.  But when I started kneading the dough, something just wasn't right.  It was way too dry and I knew I had put the right amount of flour in.

So, I remedied the best I could, kneading water into the dough bit by bit (fun fact: kneading water into a too-dry dough is much harder than kneading flour into a too-wet dough!).  I finally got the dough to a point where I knew it would at least be edible, so I proceeded with the recipe.

And then all of a sudden it hit me.  I knew what I had done wrong!

I completely forgot to put the butter into the dough.  Basically, I just made fat-free cinnamon roll dough.  (Yuck.)

I was so annoyed at myself and almost threw away the dough, but I decided to go ahead anyways.  At least I would be able to enjoy licking the frosting off if the cinnamon rolls were as bad as I imagined!

But you know what??  They weren't bad at all!!

Now, I'm not saying I would ever intentionally leave the butter out of the dough next time I make this recipe, and these were definitely not fat-free cinnamon rolls, but they were more than edible...  they were delicious!

You know what else?  I think that's the sign of a pretty-darn-good recipe if I can screw it up that bad and still end up with good results!  :o)

I will definitely be making these again (the right way hopefully!) and I wholeheartedly recommend them to you!


The frosting alone is amazing.  Exactly what I was looking for and will probably be my go-to cinnamon roll frosting from now on!

Enjoy!

Perfect Cinnamon Roll Cream Cheese Frosting Recipe
adapted from Tasty Kitchen
frosts 12 or more large cinnamon rolls

Ingredients:
6 oz cream cheese*
1/2 cup butter, softened
2 1/2 cups powdered sugar
1 teaspoon pure vanilla or almond extract
1/4 teaspoon salt

Directions:
*You can eyeball this...  just use about 3/4 of a regular 8oz brick of cream cheese!

In a large bowl, beat together cream cheese and butter until smooth.  Beat in the extract and salt, and then the powdered sugar until smooth and fluffy.

Spread over your favorite warm cinnamon rolls!


3.13.2012

fresh & easy lemon chicken pasta

I have been craving lemons like crazy lately.  Yes, another hormonal pregnancy thing I'm sure, but I love lemons anyways, so this one is not-too-weird for me.

When I am craving lemons and pasta, I usually throw together a simple homemade lemon fettuccine alfredo.  But I am afraid that I have been indulging in that treat a little too often lately and I needed to come up with something healthier for everyday!

This fresh, easy meal is super-simple to throw together and incredibly satisfying.  Most of these ingredients are in your pantry (aren't they?) and if they aren't, they should be!!


Keep the basics on hand - pasta, lemons, a few tomatoes, good parmesan cheese... and you've always got a simple, delicious meal to whip up!

Try this next time you are craving lemons, or you just need a little taste of summer!

Fresh & Easy Lemon Chicken Pasta Recipe
adapted from Steamy Kitchen on Tasty Kitchen
serves 3-4, depending on accompaniments

Ingredients:
1/2 pound long pasta, cooked al dente
2 tablespoons olive oil
1 large chicken breast (or 2 smaller ones!)
2 tablespoons butter
1 large clove garlic, finely minced
2 vine-ripened tomatoes, chopped
1 cup chicken stock (or 1/2 cup chicken stock + 1/2 cup white wine)
fresh-squeezed juice of 1-2 lemons
fresh italian parsley
salt & pepper, to taste
crushed red pepper flakes
freshly grated parmesan cheese, for topping (optional)

Directions:
In a large pan, heat the olive oil over medium-high heat.  Slice the chicken breast in half horizontally, like you are halving a bagel.  Season lightly with salt & pepper, and cook in the hot pan until lightly browned and cooked through, a few minutes on each side.  Remove from the pan, and set aside.

Turn the heat down to low and stir in the butter and minced garlic.  Sauté for a few seconds and then stir in the chopped tomatoes.  Turn the heat back up to medium-high and stir in the chicken stock, letting it simmer while you stir gently and scrape up all the good flavor-bits off the bottom of the pan!

Slice the cooked chicken breast and place it back in the pan with the sauce to warm up.  Gently toss in the noodles and season with salt & pepper and as much fresh lemon juice, parsley, crushed red pepper and parmesan cheese as you like!

Serve immediately with crusty garlic bread and a tossed salad for a great summer-tasting meal any time of the year!


3.12.2012

fresh strawberry yogurt parfaits

Do you have a simple breakfast that is your go-to comfort food for casual weekday mornings?

Oatmeal maybe?  A bowl of cereal?  Toast with jam?

Well, this...  this is my go-to breakfast!


A simple parfait made out of fresh fruit, plain yogurt and homemade granola (my favorite is coconut almond!).

There is really no way to go wrong with this one...  You can use whatever fruit you have (bananas are especially great with plain yogurt!), whatever yogurt you have and whatever granola you have!


I especially love this with still-frozen blueberries.  Mix it up and let it sit for 10-15 minutes and the blueberries start to thaw a bit, while also freezing the yogurt a bit.

Yum!!

Fresh Strawberry Yogurt Parfaits Recipe
serves 1

Ingredients:
3-5 strawberries, diced
3/4 cup plain yogurt
1/4 cup granola

Directions:
Layer & enjoy!  Simple as that!!  :o)


3.10.2012

a hard day...

This sweet little boy has had a rough couple of days.


(You can just see the fever in his face, can't you?!)

Man, it just breaks my heart when one of my kiddos is sick.

Makes you feel so...  helpless, you know?

*UPDATE:  And apparently all this teaching him how to share is sinking in.  I am now in his place. :o(  Miserable.  And maybe even more miserable because now I really know how he was feeling!*


3.09.2012

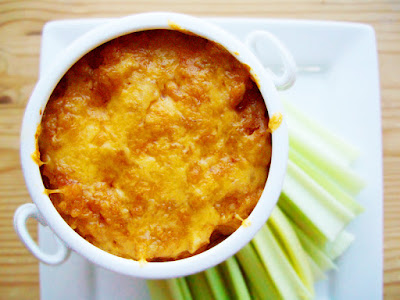
buffalo chicken quinoa casserole

The ultimate guilty-pleasure...  with a little bit of health thrown in.

Buffalo chicken in a quinoa-loaded casserole.  Yum!


If you have never tried quinoa before, it is a super-healthy protein-packed starch that is a great replacement for rice in recipes.  Give it a try sometime!

(And if you are scared of buffalo sauce, try this Chicken Broccoli Quinoa Casserole!)

I make my own condensed cream-of-chicken soup, though you can obviously substitute the canned stuff...

But homemade is super simple and much better for you (not to mention cheaper!) than the canned stuff!

Buffalo Chicken Quinoa Casserole Recipe

Ingredients:
4 cups cooked quinoa
4 tablespoons butter
1 large onion, finely chopped
2 cups chopped celery
3 chicken breasts, diced or shredded
2-3 cloves garlic, minced
1 cup Frank's buffalo sauce, divided (3/4 cup + 1/4 cup)
3 cups homemade condensed cream of chicken soup* (or 2 regular cans)
2/3 cup mayonnaise
1 1/2 cups shredded cheddar cheese

Directions:
Preheat the oven to 350ºF.  Butter a 9x13" baking dish.

In a large pan, melt the butter over medium-high heat.  Sauté the onions & celery until soft and the add in the chicken and garlic, sautéing until the chicken is cooked through.  Stir in 3/4 cup buffalo sauce and simmer until the sauce has thickened and reduced a bit;  Set aside.

In a large bowl, stir together the cooked quinoa, cream of chicken soup, mayo, most of the shredded cheese (saving a little bit to sprinkle on top) and the remaining 1/4 cup buffalo sauce.

Gently fold in the chicken/celery/onion mixture and dump into the greased pan.  Bake for 35-45 minutes, until the top is golden and the casserole is bubbling.

Serve with a drizzle of blue cheese dressing (or crumbles sprinkled on top!) if you'd like, and fresh celery on the side!


*Homemade Condensed Cream of Chicken Soup Recipe
makes 3 cups (or 2 cans worth)

Ingredients:
1 1/2 cups chicken stock
1 1/2 cups milk, divided (1/2 cup + 1 cup)
1/2 teaspoon poultry seasoning
1/2 teaspoon onion powder
1/2 teaspoon garlic powder
1/4 teaspoon dried parsley
1/4 teaspoon paprika
salt & pepper, to taste
2/3 cup + 1/4 cup flour

Directions:
In a small saucepan, combine the chicken stock, 1/2 cup milk, and seasonings and bring to a boil. In a small bowl, whisk together the flour and remaining 1 cup cold milk. Whisk the flour mixture into the boiling stock mixture and continue boiling and whisking until you have reached your desired thickness (won't take more than a minute)!

Use as directed in any recipe calling for condensed soup!


3.08.2012

perfect restaurant-quality homemade pizza dough

This recipe is perfection in homemade pizza form.  The dough is chewy and flavorful....  Perfectly crisp and yet hearty enough to hold up to its toppings.


I have been looking for years for the perfect homemade pizza crust recipe.  I've tried so many, and I've never been impressed.  Really, they all tasted too...  homemade.

I just wanted something... more, you know?  Something you would get in a real pizzeria.  Something to be excited about, not just satisfied with!

Well, I finally found it!!


Here are the three most important things I have learned through this search and process...

1.  Bread flour is vital.
2.  You must have a pizza stone!
3.  Bake at a HIGH temperature...  (500ºF to be exact!!).

Oh and like I said in my bagel recipe a few days ago...  This is another one of those if-you've-never-made-bread-before-don't-rush-into-this-without-preparing things.

I love this recipe.  It is simple and perfect in every way for me.  That said...  I never use only 4 cups of flour.  Sometimes I need an extra 1/2 cup or more to get the right dough consistency.  But that's basically because I don't have a scale to measure my ingredients.

Make sure you click on over to Annie's Eats original recipe of this before you make it.  She's got some great step-by-step photos and tips!

Perfect Homemade Restaurant-Quality Homemade Pizza Dough Recipe
adapted from Annie's Eats
makes 2 large pizzas, serving 6-8 people

Ingredients:
1/2 cup warm water (105ºF)
2 1/4 teaspoons active dry yeast
4 cups bread flour (plus a bit more)
1 1/2 teaspoons salt
1 1/4 cup water, room temperature
2 tablespoons extra-virgin olive oil

Directions:
In a small bowl, sprinkle the yeast over the 1/2 cup warm water;  Set aside.

In the bowl of your mixer, stir together the 4 cups flour and salt.  Measure the remaining 1 1/4 cups water into the bowl with the yeast & warm water mixture.

With the regular beater blade and the mixer on low, pour in the water/yeast mixture and the olive oil until the dough starts to come together.

Switch to the dough hook and knead the dough on LOW speed for about 5 minutes, adding more flour a tiny bit at a time if needed, and kneading until the dough is smooth and elastic.

Transfer the dough to a large bowl that has been lightly oiled and turn the dough once to coat it.  Cover the bowl with oiled plastic wrap or a tightly fitting lid and then place in a warm place to rise for 1 1/2 - 2 hours, until doubled in size.

Gently punch down the dough to deflate it.  Turn the dough out onto a lightly floured surface, separate into 2 halves and form each half into a round.

(At this point, if you are not going to use them right away, or if you are only going to make one pizza, wrap the dough in plastic wrap and then place it in a ziploc freezer bag in the freezer.  When you are going to use it, take it out of the freezer in the morning and place it in the fridge to thaw.  When you preheat your oven for dinner, take the dough out to rest and come to room temperature for about 30 minutes before proceeding.)

Cover the dough rounds with a damp towel and let them rest on the counter for 10-30 minutes while you preheat the oven to 500ºF with a baking stone on the lower rack.

Place a piece of parchment paper on a cutting board (or use a pizza peel if you have one!) and dust it lightly with flour.  Gently stretch and shape the dough to the size you'd like with floured hands.

Brush a bit of olive oil (garlic infused if you have it!) on the outside crust, then spread your favorite sauce, cheese and toppings all over the center.

Use the cutting board to transfer the parchment and the pizza to the baking stone and bake for 8-12 minutes, until the crust is golden brown and the cheese is bubbly.


Related Posts with Thumbnails